Recipes
Your First Event in 10 Minutes
This recipe takes you through the create wizard to an event with a name, dates, a location, at least one ticket and a public page you can share. It is about ten minutes of work. Every value below is a field you can see in the wizard or in the event workspace.
Before you start
- Sign in to Forge with a Salesforce user who holds a Blackthorn Events permission set, for example Blackthorn_Event_Organizer.
- The Blackthorn Events managed package is installed in your org.
- For a paid event, connect a payment gateway first (Admin > Payment Gateways). A free event needs no gateway.
Settings at a glance
| To achieve | Set this | To this value |
|---|---|---|
| A free event | Event pricing (Basics step) | Free event. Paid event is the other choice and brings up the payment gateway choice on the Tickets step. |
| Unlimited seats | Total Capacity (Basics step) | Leave blank. Cap each ticket with Quantity Available instead. |
| Correct local times for registrants | Timezone (Basics step) | The venue's time zone, or the zone you advertise for an online event. |
| Exact start and end times | Start Time and End Time (Basics step) | Type the time (9:45 am, 21:45) or open the clock button for suggestions. Event Group (Basics step) lists the newest groups first; use Show more or search for older ones. |
| A shareable page right now | Review step button | Save & Publish. It creates the event as Active and publishes it. |
| Time to finish setup before anyone can see it | Review step button | Save & Close. The event is saved as Draft and is not published. |
Steps
- Choose Events in the left sidebar, then New Event at the top right, then Create from scratch. (Clone existing event is for copying an event you already have.)
- Basics step, Identity: type the Event Name (required, up to 80 characters), for example Planner Conference 2026. Add a Description if you have one.
- Basics step, When: set Start Date, Start Time, End Date and End Time, and choose the Timezone (required). The end must not be before the start.
- Basics step, Where: choose Event Type, In-Person, Virtual or Hybrid (required). In-Person shows venue fields (search a Venue Account, or type Venue Name, Street, City, State, Postal Code and Country). Virtual shows a webinar Platform and a Meeting URL. Hybrid shows both.
- Basics step, Event pricing: choose Free event or Paid event. Leave Event Settings on Default.
- Still on Basics, below those fields: set Event Organizer if you want a named host, leave Total Capacity blank for unlimited, and turn on Enable event waitlist only if you want people to join a waitlist when seats run out.
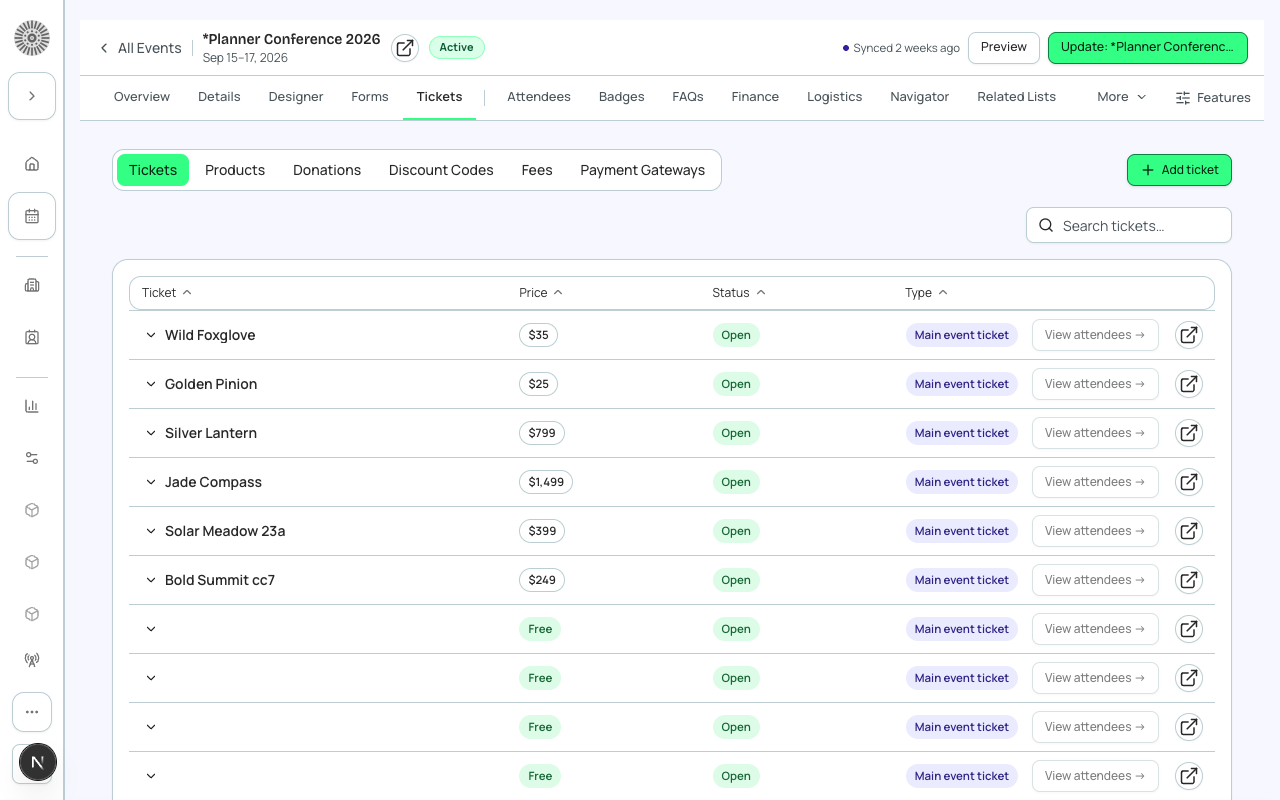
- Tickets step: choose Add Ticket Type. Enter Ticket Name (for example General Admission), leave Ticket Type as Main Event Ticket, enter Price (0 for a free ticket), and Quantity Available (blank means unlimited). Choose Save Ticket. Repeat for more tiers. For a paid event, also choose the payment gateway on this step.
- Reg Form step: leave every form as None for your first event. You can attach forms later from the Forms tab.
- Add optional features step: leave everything off. Each switch adds a step (Donations & Products, Speakers, Sessions, Sponsors, Navigator, Recurring event, Comms) and can also be turned on later.
- FAQs & Attachments step is optional. Review shows a summary of every section, with Edit links to jump back.
- On Review choose Save & Publish to go live now, Save & Open Page Designer to publish and then design the page (with no tickets it saves a Draft instead), or Save & Close to keep the event as a Draft.
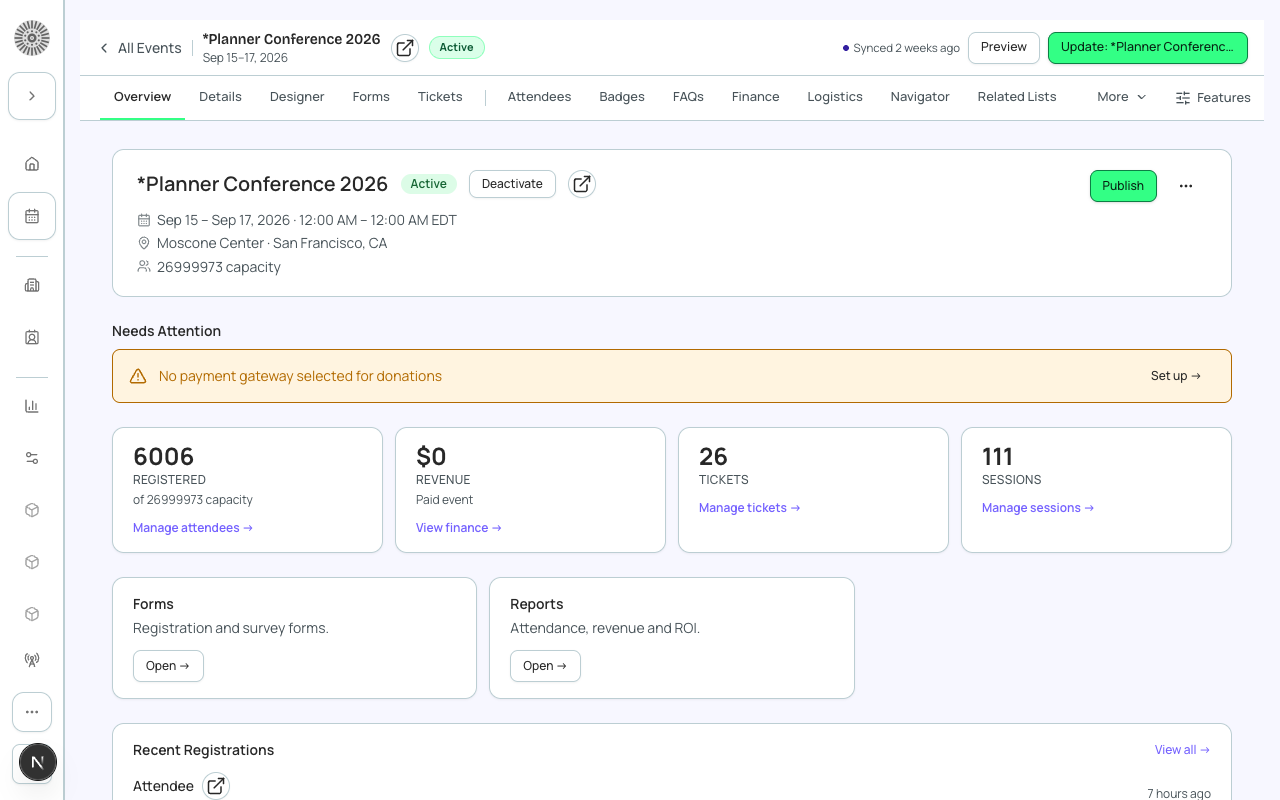
- You land in the event workspace. Open Overview, check the Needs Attention list is empty, then use View public page. Share that page's address with your audience.
Publishing happens immediately
Save & Publish and Save & Open Page Designer both publish the event straight away (with no tickets, Save & Open Page Designer saves a Draft instead), so the public page is live before you have designed it. If you are not ready, choose Save & Close and publish later from Overview.
If Publish is disabled
The Publish button on Overview stays disabled until the event has a start date, its Status is Active, and it has at least one ticket (Donation, Guest and Product items do not count). Hover the button to see which one is missing. If walk-up registration is on without a walk-up ticket, Publish is disabled with Walk-up ticket required. To take a published event offline, open the menu next to the header's Published pill and choose Unpublish; the dialog counts scheduled sends that have not gone out yet and offers Pause scheduled sends (on by default). In the wizard, an event with no tickets, or a paid event with no payment gateway, can still be saved, but Save & Publish is disabled and the Review step lists what is required to publish. Save & Close stays available, and with no tickets Save & Open Page Designer saves a Draft and opens the designer.
What this creates in Salesforce
| Forge | SF Object | SF Field |
|---|---|---|
| Event Name | conference360__Event__c | Name |
| Start / End Date | conference360__Event__c | conference360__Event_Start_Date__c / conference360__Event_End_Date__c |
| Event Type (In-Person / Virtual / Hybrid) | conference360__Event__c | conference360__Event_Location__c = Venue / Virtual / Hybrid |
| Status | conference360__Event__c | conference360__Status__c = Draft, or Active after Save & Publish |
| Published | conference360__Event__c | conference360__Visible__c, set when the event is published |
| Free event | conference360__Event__c | conference360__Free__c |
| Ticket name | conference360__Event_Item__c | conference360__Item_Name__c |
| Ticket price | conference360__Event_Item__c | conference360__Price__c |
| Ticket type | conference360__Event_Item__c | conference360__Type__c = Main event ticket |
| Quantity available | conference360__Event_Item__c | conference360__Quantity_Made_Available__c |
Where to find it in Salesforce
The new event is a conference360__Event__c record. Use the Salesforce icon next to the event title on Overview to open it. Each ticket is a related conference360__Event_Item__c record.
Verify
- The event appears in the Events list. An Active event is shown as Published.
- Tickets & Items lists your ticket with its price, or a Free chip for a free ticket.
- View public page opens the registration page.
- Submit a test registration. The Attendees tab shows the person with Registration Status Registered, and the Registered tile on Overview goes up by one. The status next to the event header shows Live when the count updates on its own within seconds, or Updated with the time since the last refresh; the refresh button updates it immediately.
- In Salesforce the attendee record exists with Registration Status Registered (or Waitlisted - Pending if the ticket or event was already full).