Beta & Experimental Features
Badges (Beta)
Early AccessManage on the Beta Features pageBadges lets you design, preview, and print name badges and check-in passes for your attendees from inside Forge, with no third-party design tool. Each badge is a layout (size, front and back, text, images, QR codes) that fills itself in from the attendee record at print time.
Beta feature
Badges is listed under Coming soon on /beta, and you can switch it on there for your org. Layouts, export options and limits may change before launch.
Where to find it
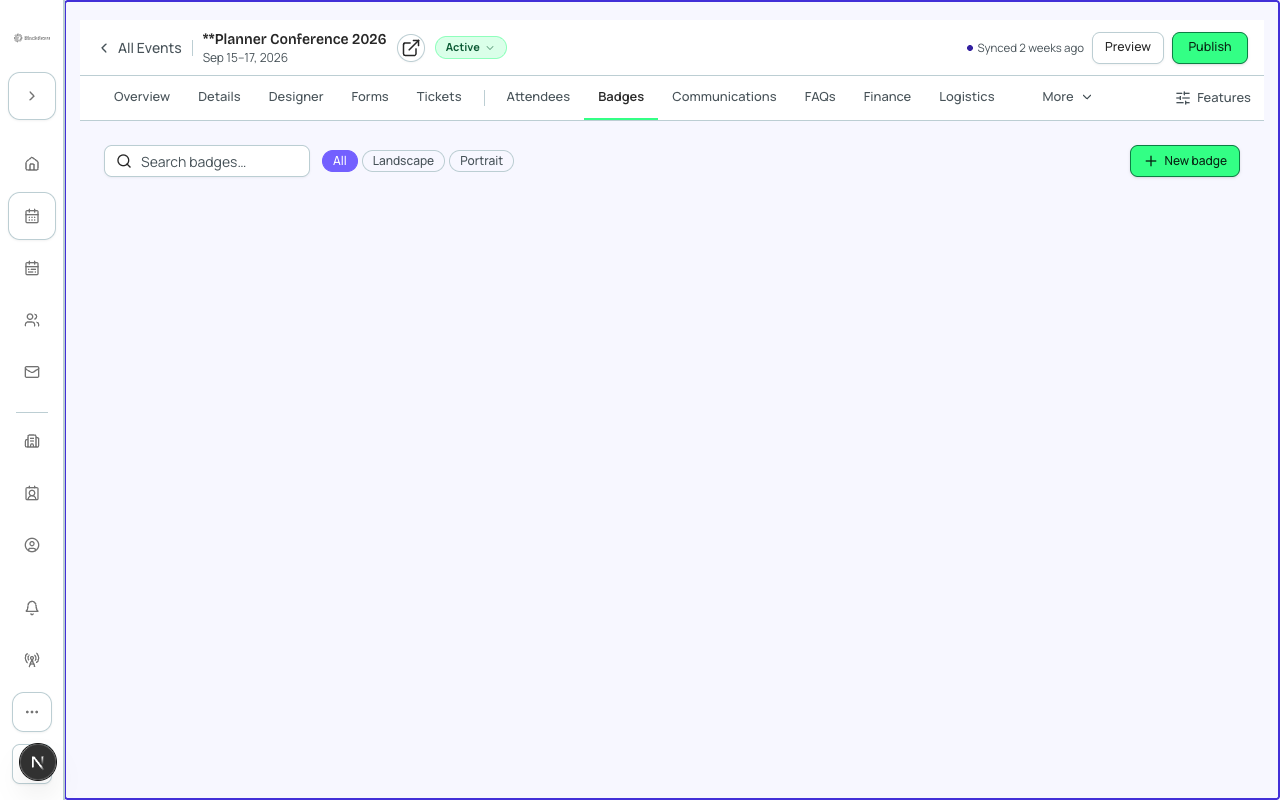
Open an event and choose the Badges tab (Manage > Badges). The page lists every badge design for that event as a card, with a search box and filters (All, Landscape, Portrait, Queued). Each card shows the badge size, orientation, how many attendees it applies to, and when it was last edited. Cards cap at 20, with Show more for the rest.
| Button | What it does | When to use it |
|---|---|---|
| New badge | Starts the new-badge wizard: Format (pick a stock size, or Custom size with width and height), Template (pick a starter or Start blank), Details (badge name, Double-sided, and a Record type if your org has more than one). | Create one badge per audience that needs a different look, for example Attendee, Speaker, VIP, Staff. The global New badge page always opens a blank badge and no longer restores your last unsaved draft. The global badge list, New badge and Edit pages all open the same editor as event badges, and the old /events/badges address now redirects to the Badges list. |
| Templates | Opens the org-level template browser. | Start from a layout that already exists. An org-level template is read-only: use Clone to this event to get an editable copy. |
| Duplicate | Copies a design on the same event. | Make a VIP version of a finished General badge, then change only the accent colour and badge type. |
| Export to PDF | Opens the PDF export dialog (see below). | Send the whole event, or a selection of designs, to a print shop. |
| Print queue | Shows attendees who have not yet been printed for that badge and lets you mark them printed. | Print only the people who registered since your last batch. |
| Print for attendee | Search one attendee, pick a label size (badge, Zebra 4 x 6 or 3 x 4, Brother 62 mm, Letter) and Print, which opens your browser print dialog, or download the PDF. Printing again logs a reprint. | Walk-up registrations and reprints at the door. |
| Delete | Permanently deletes the design from Salesforce after confirmation. Attendees assigned to it no longer have a design. | Only for designs you will never use again. |
Global templates
Editing a global (org-level) template shows an Editing global template pill, because a change affects every event that uses it. Choose Clone instead unless you really mean to change all events.
The badge designer
The designer has a left rail with four tabs, the canvas in the middle, and a slim top bar. Click an element on the canvas to edit it: a floating toolbar offers smaller/larger text, bold, alignment, colour, duplicate and delete (delete can be undone). Drag to move; guides snap. With the canvas focused, arrow keys move an element, Ctrl+Arrow resizes it, and Delete removes it.
| Left rail tab | What it holds | Recommendation |
|---|---|---|
| Templates | Starter layouts such as VIP stack (bold attendee name with an accent band and QR), Mirror portrait (double-sided with mirrored backs for sponsor logos), Sponsor split (wide badge with a sponsor rail and barcode footer), and Capability Showcase. Browse all templates opens a picker with Library, My templates and Team tabs and a search box. | Applying a template replaces every element on the badge. You are asked to confirm and can undo straight afterwards. |
| Elements | Text, Image, Shape (rectangle or circle), Line, QR code, Barcode, Profile photo, + Field Group and + Icon Slot. Click an item to add it, or drag it onto the canvas to place it where you drop it. | Profile photo pulls the attendee photo from Salesforce automatically, so you do not upload one per person. |
| Fields | Merge fields (see the table below) and Custom tokens for form answers. | Use merge fields for anything that differs per attendee. Type fixed text only for things that never change. |
| Layers | Every element on the current side, with Show/Hide, Lock/Unlock, move up/down and duplicate. | Lock backgrounds and logos so they are not dragged by accident. Locked elements can still be edited from the list. |
Top bar and Setup menu
| Setting | What it does | Recommendation |
|---|---|---|
| Badge name / Notes | Name shown on the card and in the export dialog. Notes are free text for printing instructions. | Name by audience (VIP badge) and put the stock and printer in Notes. |
| Registration types | The ticket types this badge applies to. Empty means All registration types. | Assign one design per ticket type to print the right badge automatically; leave empty for a single badge for everyone. |
| Preset | Standard sizes: 3 x 4 in, 4 x 3 in, 4 x 6 in, 3 x 5 in, 2.25 x 3.5 in, 6 x 4 in, credit card 85 x 54 mm, or Custom. | Match your physical badge stock exactly. Choose Custom only for unusual stock. |
| Width, Height, Units, Orientation | Custom canvas size in inches, millimeters or pixels, portrait or landscape. | Use inches or millimeters for print. Pixels are only for on-screen designs. |
| Bleed | Extra area past the trim edge that the background should cover. | Ask your print shop. Set it, then use Include bleed and Crop marks at export. |
| Corner radius | Rounds the badge corners. | Match your stock if it is die-cut with rounded corners. |
| Background color / Background image | Fills the whole badge. A background image can be Replaced, zoomed, offset horizontally and vertically, and reset with Reset crop. Print background image on badge output turns printing of the image on or off. | Turn the print option off if your stock is pre-printed and you only print the variable data. |
| Show grid overlay, Grid spacing, Snap elements to grid, Show rulers and guides | Layout aids. Grid and Snap toggles also sit at the canvas. | Turn Snap on for aligned columns. |
| Single side / Front & back | Single-sided or double-sided. With Front & back you can Edit back side, Copy front to back, and Mirror back layout (flips the front horizontally so sponsor rails line up on the reverse). | Use double-sided for a sponsor or agenda on the back. |
| Zoom, Undo, Redo, Save | View and edit controls. The header shows Saving, Saved with the time, or Unsaved changes; leaving while saving prompts you. | Save before you leave the page and before uploading an image. |
Element settings
| Element | Settings | Notes |
|---|---|---|
| Text | Content (can include merge fields in double braces such as {{Attendee.Name}}), Font family (Body Manrope, Display Bricolage Grotesque, System Sans), Font size in points, Weight 100 to 900 (400 regular, 700 bold), Color, Alignment, Line height, Letter spacing, Text case (As entered or Title Case), Auto-fit text with a Max size. | Turn on Auto-fit text for names: long names shrink inside the box instead of being cut off. Custom fonts are not supported. |
| Position and size | X and Y (top-left corner) and W and H, all percentages of the badge from 0 to 100. Align buttons align to the badge or to each other. | Use the align buttons rather than typing numbers when centring. |
| Image | Upload (PNG, JPEG or WebP, max 5 MB), required Alt text, Replace. You can also drop a file onto the canvas. | Save the badge once before the first upload. |
| Profile photo | Shape: Circle, Rounded or Square. | Shows the attendee photo from Salesforce. |
| QR code | Data (required) and Quiet zone. The check-in QR encodes the attendee's Salesforce record ID. | Keep the quiet zone on so scanners read the code reliably. |
| Barcode | Format Code 128 or Code 39, and Data (required, for example {{Attendee.CheckInQR}} or another Attendee token). | Use Code 128 unless your scanner requires Code 39. |
| Shape and Line | Fill, Stroke, Stroke width, rectangle or circle; lines are horizontal or vertical. | Use a coloured band to separate ticket tiers at a glance. |
| Field group | Tokens (add, reorder, remove), Separator, Format and Fallback shown when all tokens are empty. | Combine Title and Company on one line so the line collapses cleanly when one is missing. |
| Icon slot | Source field (Registration type, Status or Custom field), Field key, Value map (value to icon), Fallback icon, optional Tint. Icons come from a Library or a Custom URL (HTTPS only) or an upload. | Map a dietary answer to an icon, or a ticket type to a ribbon. |
| Conditional logic | Rules with operators Equals, Does not equal, Includes, Is one of, Is not one of, Is empty, Is not empty. By default every element is visible to everyone. | Show a VIP ribbon only when Badge type equals VIP. |
Merge fields available on badges
| Badge field | Token | Source |
|---|---|---|
| Full name / First name / Last name | Attendee.Name, Attendee.FirstName, Attendee.LastName | Attendee record |
| Company | Attendee.Company | Attendee or its Contact's Account. Greyed out as Not available in your org if the field does not exist. |
| Job title | Attendee.Title | Attendee record, if your org has the field. |
| Pronouns | Attendee.Pronouns__c | Custom pronouns field, if present. |
| Badge type | Attendee.Badge_Type__c | VIP, Speaker, Staff and similar, if present. |
| Check-in QR | Attendee.CheckInQR | Encodes the Attendee Salesforce ID for scanning. |
| Event name / Event dates / Venue | Event.Name, Event.FormattedDates, Event.Venue | Parent event |
| Custom tokens | Your label plus a Form element key or API name | Add a custom token to use any form or RSVP answer (for example dietary needs) on a badge. Give it a Sample value for the preview. |
Use Preview as (Attendee, Speaker, VIP, Staff, Long name) to see how real data looks, switch on Safe zone to see the printable area, and check Print readiness: Text fits its box, QR code present, Inside safe zone, Name field present. Fix every item before printing a full batch.
Exporting and printing
- Click Export PDF (on the Badges page or in the designer).
- Select the badges to include (at least one). Real attendees on the event are filled in on the server.
- Choose Page size: Badge size (one badge per page), Letter, A4 or Custom (width, height, unit).
- Choose Sides: Front, Back or Both. Duplex align keeps fronts and backs matching and needs double-sided badges.
- For sheets, set Layout: Single or Sheet, with Packing Grid or Flow, Columns and Rows (or Auto), Gap, Margin and Orientation.
- Turn on Include bleed and Crop marks if your print shop asks for them, then Preview PDF.
- Click Export PDF. Label size and printer name prefill from the event print settings (Save as event default), the Attendees page shows Printed, Not printed or No badge, and Reprint badge records a reason in the print log.
Attendee personal data on badges
Badge PDFs contain attendee names, companies and QR codes tied to Salesforce Attendee records. Treat exported PDFs as personal data: do not share them publicly or store them outside your organization's approved systems.
Template libraries
- My templates are saved with Save as template and are available across your events. Saving stores the layout only, no attendee data.
- Share with team makes a template visible to your team under Team. Only an admin can share.
- History (top bar, saved badges only) lists earlier saves, 20 at a time. Select one to preview it, then Restore to save it as the newest version. The badge keeps its current name, and unsaved edits ask for confirmation first.
- Template names are limited in length; the form tells you the maximum.
Limits and current gaps
- Fonts are limited to the three options above; no custom fonts.
- One export includes up to 5,000 attendees. If more are matched, the PDF is truncated and Forge shows a notice with the total available, so export in batches (for example per ticket type).
- PDF only; no SVG or PNG export.
- Integration with print-shop services is not built.
Where badge data lives
Each badge design is a Badge record in Salesforce, linked to the event, with the designer layout saved as a JSON file on that record. Your saved and team templates and the printed-attendee tracking are kept in Forge's database (templates hold design only). Attendee data for a PDF is read from Salesforce at export time and is not stored in Forge. Deleting a badge removes it from Salesforce.
In the editor's Assign tab, Applies to ticket types and Applies to statuses limit which attendees a badge is printed for. Statuses are the attendee's Salesforce registration status (Registered, Pending, Canceled and so on). A badge with nothing selected applies to everyone; with both set, an attendee must match both. The org-wide Badges list shows the event each badge belongs to in the Event column, so badges with the same name are easy to tell apart. Selecting a badge that belongs to an event opens it in that event's editor; only badges with no event open in the global editor.